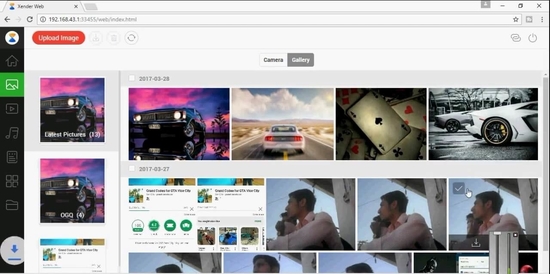
Xender is a smart utility that can speed up file transfer between devices by a significant margin.
In this tutorial, we will take you through the step-by-step procedure to download and install Xender onto your Windows operating system.
How Does Xender Work?
Xender uses wireless connectivity to connect two devices and exchange files without using LAN/USB cables. You can forget all the hassles involving USB or Bluetooth and share files between devices in a matter of seconds using Xender.
Xender provides you with a user-friendly interface that makes file transfers a breeze.
Moreover, it supports a wide variety of file types, including but not limited to videos (MP4, FLV, AVI, WMV, MOV), music (MP3, WMA, WAV), pictures (JPEG, PNG, TIFF, GIF) and documents (DOC, DOCX, RTF, PDF).
As far as operating systems are concerned, Xender officially supports Android and iOS devices, and it is possible to install the utility on Windows-based systems as well — albeit with the help of a little tweak.
Xender for PC Top Features
- There’s no cost associated with Xender. It’s a free utility.
- Xender is cross-platform compatible. You can transfer files between Windows–Android, Windows–iOS, or iOS–Android devices.
- The file transfer speed is multiple times higher compared to LAN and Bluetooth connectivity.
- It allows you to transfer almost all types of files, including executable files and apps.
- Xender doesn’t require internet connectivity to share files between multiple devices.
How to Download and Install Xender
Xender For Android and iOS Device:
Installing Xender on Android and iOS is rather straightforward. Android users can directly go to Google Play Store, perform a search for Xender, and download/install it like any other app.
iPhone users can find the Xender utility in the iTunes repository. Alternatively, you may also download Xender for PC from FileHippo or any other software download sites.
Xender for Windows PC
Previously, Xender used to support the Windows operating system. However, the app has been removed from the Windows app store.
However, it is still possible to use Xender for Windows PC, but to do that you need to use an Android emulator. You can use Xender for PC with Windows 10, Windows 8, and Windows 7 operating systems.
What’s an Android Emulator?
In layman’s terms, an emulator is a platform that enables one device (host) to run software designed for another device (guest).
Android emulators can be interpreted as a virtual Android device that can be used as a target platform on non-Android devices to run Android apps.
To install Xender for PC, you will require such an Android emulator, which will behave like a virtual Android device on your Windows computer.
There are lots of Android emulators to choose from. Some of the most popular ones are BlueStacks, AmiDuos, ArChon, and Bliss, to name a few.
In this tutorial, we will be using BlueStacks, as it is one of the most widely used Android emulators on the market.
Let’s now find out how to download BlueStacks and use it as the virtual Android device to install Xender on your Windows PC.
Step 1: Download BlueStacks
You can download BlueStacks from the official website. There is a download button right at the top of the page. You will need to click on the link to initiate the download.
Once the download is ready, run the BlueStacks installer and follow the on-screen instructions to complete the installation process. You may have to restart your computer for the changes to take effect.
Step 2: Launch BlueStacks and Sign In
Once the installation is complete, click on the application icon to launch BlueStacks. It will ask you to authenticate yourself using your Google credentials. Provide your Google username/password to sign in to the BlueStacks dashboard.
Step 3: Navigate to Google Play Store
From the BlueStacks dashboard, go to All Apps and click on Browser.
In the browser address bar, type “http://play.google.com” and press Enter. A new dialogue box (Complete Action With) will appear, which will give you two options to choose from: Browser and Play Store. Select the second option and it will take you to Google Play Store.
Step 4: Search for Xender and Install It
Type “Xender” into the Play Store search bar. Select the intended app and click on the download link. Once the download is complete, the Play Store will automatically install Xender on your PC.
How to Use Xender for PC?
Now you are done with the installation of Xender onto your Windows computer. The next step is to use it to transfer files between devices. Here’s how to do that.
- First, go to a web browser on your PC and open the Xender Web App (http://web.xender.com). You will see a QR code, which will be later used to establish a connection to the other device.
- If you want to connect your Android device, then open the Xender app on your smartphone as well. Click on the + sign in the bottom-right corner.
- A few options will open up. Select the Connect to PC option.
- Now go to the QR code option on your PC and use your smartphone to scan the code.
- Your smartphone will be automatically connected to the PC, once scanning is completed.
There you go! Now you can use the file sharing option (Send/Receive File) to transmit your files in a quick and effective way. Most importantly, Xender for PC even allows you to create a group of users to share files among using multiple devices at the same time!
So that’s all you need to do to download and install Xender for PC on your Windows computer. We hope that you have found this article useful. Please make use of the comments section to let us know your thoughts and feedback.


